Understanding Data Variables
Label designs can quickly become complex with multiple objects to edit. Data variables can help simplify the design by creating placeholders that get replaced with the variable's value.
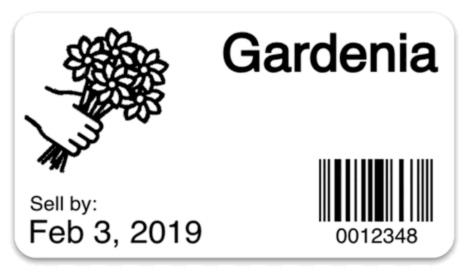
Let's check out an example. Here's a customer (or patient) file label.
The customer name is John Doe with a customer ID of 01234567. The customer ID is used twice, once for the human-readable text and again for the barcode. We have to remember to edit both the text and the barcode every time – or else there's a risk they will be out of sync. Not good.
Let's go a step further. This design requires a label to be "double-sided" – folding over the file. Now we must edit the design in four(!) places. Even worse!
Add a Data Variable
This is the problem Data Variables were made to solve. To add a variable, click on the Data tab and click the plus (+) button to Add a Data Variable. Type in a name for the new variable: ID
Here's what it looks like when you create a variable. It is unused.
Note: I changed the value to "12345" for demonstration purposes.
Use a Data Variable in Text
Click on a text object and delete "01234567", click Data, and then click ID.
Clicking the ID button inserts {ID} into the Text object. The variable's value "12345" is shown on the label design.
You might wonder. What is the {ID} format? It's just a special way for Label LIVE to know that {ID} should be replaced with the value of the "ID" variable. Pretty smart.
Use {ID} in All The Places
You can do the same for all four occurrences of the customer ID.
Feel free to hop back over to the Data tab and change the variable value. Watch it update... LIVE. Do you feel the power? Yes, you do!
This is where we make the joke: "We put the LIVE in Label LIVE."
Creating a Variable From Text Objects
Sometimes it's easier to create variables from an existing text object. To do that, click on a Text object and click on the {} button. Choose a name (here we choose NAME), and voila, a brand new variable!
Click the Data tab and change NAME to something else. It works.
Hint: You can reorder the variables (and design objects) by clicking and dragging.
Change the mirrored bottom name to use the new {NAME}
And you're done.
Variables are powerful. You can declare your Design "finished" – and continue most of your day-to-day work from the Data tab.
Form View for Operators
You can go one step further and change to "Form" view. Click the Data tab (possibly twice) and click Form.
A nice simplified form to edit when you need to print a new label. Hover over the blue print button to see additional options like automatic printing on pressing ENTER (useful for barcode scanning). You can also have Label LIVE clear the form on each print.
Locking a Design
Prevent accidental changes to the design by locking the design elements. This isn't a security feature, but more just a simple protection against someone unknowingly undoing your work by editing the Design directly.
Next Steps... Linking Spreadsheet Data
Now that you know the basics of variables, there is a lot more to explore. For example, when you import a spreadsheet or CSV file, you'll see that variables are created for every column in the imported spreadsheet. Read more about importing data in our Guide.